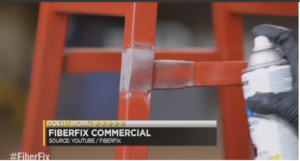
Magic of FiberFix Tape: A Revolutionary Solution in Home Improvement!
Are you ready to experience a breakthrough in DIY repairs? Say hello to FiberFix tape, a miraculous innovation that’s revolutionizing the way we fix things! Gone are the days of temporary fixes and constant frustration. FiberFix is here to bring a permanent, almost magical solution to your repair needs.

Step 1: Embrace the Power of Preparation Before you begin, don your gloves – think of them as your armor in the battle against breaks and splits. Make sure your battlefield (the broken area) is clean and, if it’s as smooth as ice, rough it up with the provided sandpaper. This isn’t just cleaning; it’s preparing for a transformation.
Step 2: Unleashing the Beast FiberFix isn’t just tape; it’s a beast in a pouch, a marvel of modern engineering, waiting to unleash its power. As you tear open that pouch, you’re not just opening packaging – you’re setting the stage for a repair revolution.
Step 3: Awaken the Resin Dip the FiberFix in room-temperature water. This isn’t just wetting tape; it’s awakening the mighty resin within, the core of FiberFix’s unparalleled strength. A gentle squeeze removes excess water, but it’s really you coaxing the tape to reveal its full potential.
Step 4: The Art of Application Wrap the tape around the broken item. This is where your skill meets FiberFix’s resilience. The first layers are a delicate dance, ensuring the tape doesn’t slip. Then, as you wrap more, it’s a show of strength – pull it tightly, as if you’re commanding the tape to fuse with the item, becoming one.
Step 5: Layering – The Secret to Unbreakable Bonds Extend beyond the break, wrapping with a determination that says, “This will not break again.” Each layer is a pledge of durability, a promise of a fix that’s more than just a repair; it’s a restoration to glory.
Step 6: The Final Seal Once fully wrapped, use the vinyl strip like a wizard uses his wand – to finalize the enchantment. Wrapping it should feel like you’re locking in the magic, the warmth and oozing resin the telltale signs of a bond that’s not just strong, it’s FiberFix strong.
Step 7: The Rapid Transformation In mere minutes, what was broken is now reborn, stronger and more resilient. As you remove the vinyl strip, revealing the glossy finish, you’re not just looking at a repaired item; you’re witnessing a transformation, a testament to the miraculous power of FiberFix.
Step 8: The Invisible Mend And for the final touch, especially if you’re mending something with aesthetic value like a stool, paint over FiberFix. Watch in awe as the repair blends seamlessly into the object, leaving no trace, no scar – just perfection.
Choose Your Weapon Wisely Select your FiberFix tape with the wisdom of a seasoned warrior. For the small, intricate battles, a one to two-inch roll is your ally. For the grand challenges, the four-inch wrap is your champion.
A New Era of Repairs Welcome to a new era in home repairs, where FiberFix tape isn’t just a tool – it’s a miracle in your toolbox, turning the ordinary into the extraordinary, ensuring that what you fix stays fixed, in a way that’s nothing short of magical. Embrace the power of FiberFix and become the hero of your home repairs!